
If you are browsing a social media profile, there’s a chance that you’ve come across a profile that has a link in it.
Having one link is quite limited, and in most cases, people want to have multiple links in their social media profile. This has lead to the growth of ’link in bio’ services that fill this need. Some of these services include Bento, Beacons, Linkpop, Bio Link and more. One of the largest and more commonly seen link in bio service is Linktree.
A lot of these services offer a free tier, but the one issue I found was that a lot of these service either didn’t offer the ability to use your own domain or charged money to do so.
Beacons charge about $8.33 a month to use a custom domain while Linktree doesn’t even offer this as a paid option.
I decided to look into creating my own simple links website that I could host on my own domain, under the subdomain, links.akashgoswami.com.
After doing a bit of searching, I found a great theme called Lynx that uses Hugo (a static site generator I used to create my main website) to generate a great looking, simple link in bio website.
Using this theme and a free hosting service like GitHub Pages or Cloudflare Pages, you can get a link in bio site up and running in less than 30 minutes!
This mini-guide covers the steps I took to build and deploy my links website using Cloudflare Pages in less than 30 minutes.
Prerequisites
Things you’ll need before getting started…
A text editor
I like using Visual Studio Code. Download these Hugo extenstions as well to help with syntax highlighting.
Git and Hugo
Follow the steps here to install Git if you haven’t already and these steps to install Hugo.
A GitHub and Cloudflare account
Register a GitHub account here and a Cloudflare account here.
A domain name
Not necessary but the whole point of this guide is to host your link in bio site on a custom domain. Custom domains cost a little money, roughly between $1-20 a year depending on the domain registrar and domain extension you choose. If you just need a simple link in bio site, paying for just a domain name is a lot more cost effective than paying for one of these link in bio services.
Don’t know where to get a domain name from? I would recommend Porkbun.
Setting up the website
Open the command line app (or terminal) on your machine and enter the following command:
hugo new site links
Then navigate into the newly created folder and create a git repository:
  cd links
  git init
After that, we’ll add the Lynx theme to the site:
git submodule add --depth=1 https://github.com/jpanther/lynx.git themes/lynx
Modifying the website
Open the website directory in your code editor and nagivate to hugo.toml
Copy the example below into your hugo.toml file and edit it with the links you want on your site (and remove the links you don’t want as well!).
You can also refer to the offical theme docs here to understand how the theme works.
baseURL = 'https://YourDomain.com'
languageCode = "en"
defaultContentLanguage = "en"
title = 'Links - YOUR NAME'
theme = 'lynx'

enableEmoji = true
disableKinds = ["taxonomy", "term"]

[params.author]
  name = "YOUR NAME"
  headline = "SHORT DESCRIPTION"
  image = "author.png"

  links = [
    { email = "[email protected]" },
    { threads = "https://www.threads.net/@USERNAME" },
    { twitter = "https://twitter.com/USERNAME" },
    { x = "https://x.com/USERNAME" },
    { tiktok = "tiktok.com/@USERNAME" },
    { mastodon = "https://mastodon.social/@USERNAME" },
    { github = "https://github.com/USERNAME" },
    { youtube = "https://youtube.com/USERNAME" },
    { linkedin = "https://www.linkedin.com/" },
    { link = { href = "https://google.com", text = "Google" } },
  ]

[module]
  [module.hugoVersion]
    extended = false
    min = "0.86.1"
Once you’ve configured and saved the settings in hugo.toml, test out what the site will look by running the following command:
hugo server --environment development
You can vist your website at http://localhost:1313/
To stop the server, just press Ctrl+C within the terminal.
Once you are happy, commit the files to your repository either via the command line or via GitHub Desktop and push the repository to your GitHub account. You can make the repository public or private, it won’t matter which you pick.
Deploying the website
Now that our website is ready in our GitHub repository, head over to Cloudflare, login and then click the ‘Workers & Pages’ option in the side bar.

Click the blue “Create application” button and then click pages and then “Connect to Git” and link your GitHub account to Cloudflare.
Once you’ve done that you should be able to see your ’links’ repository within Cloudflare. Click it and then continue the setup.
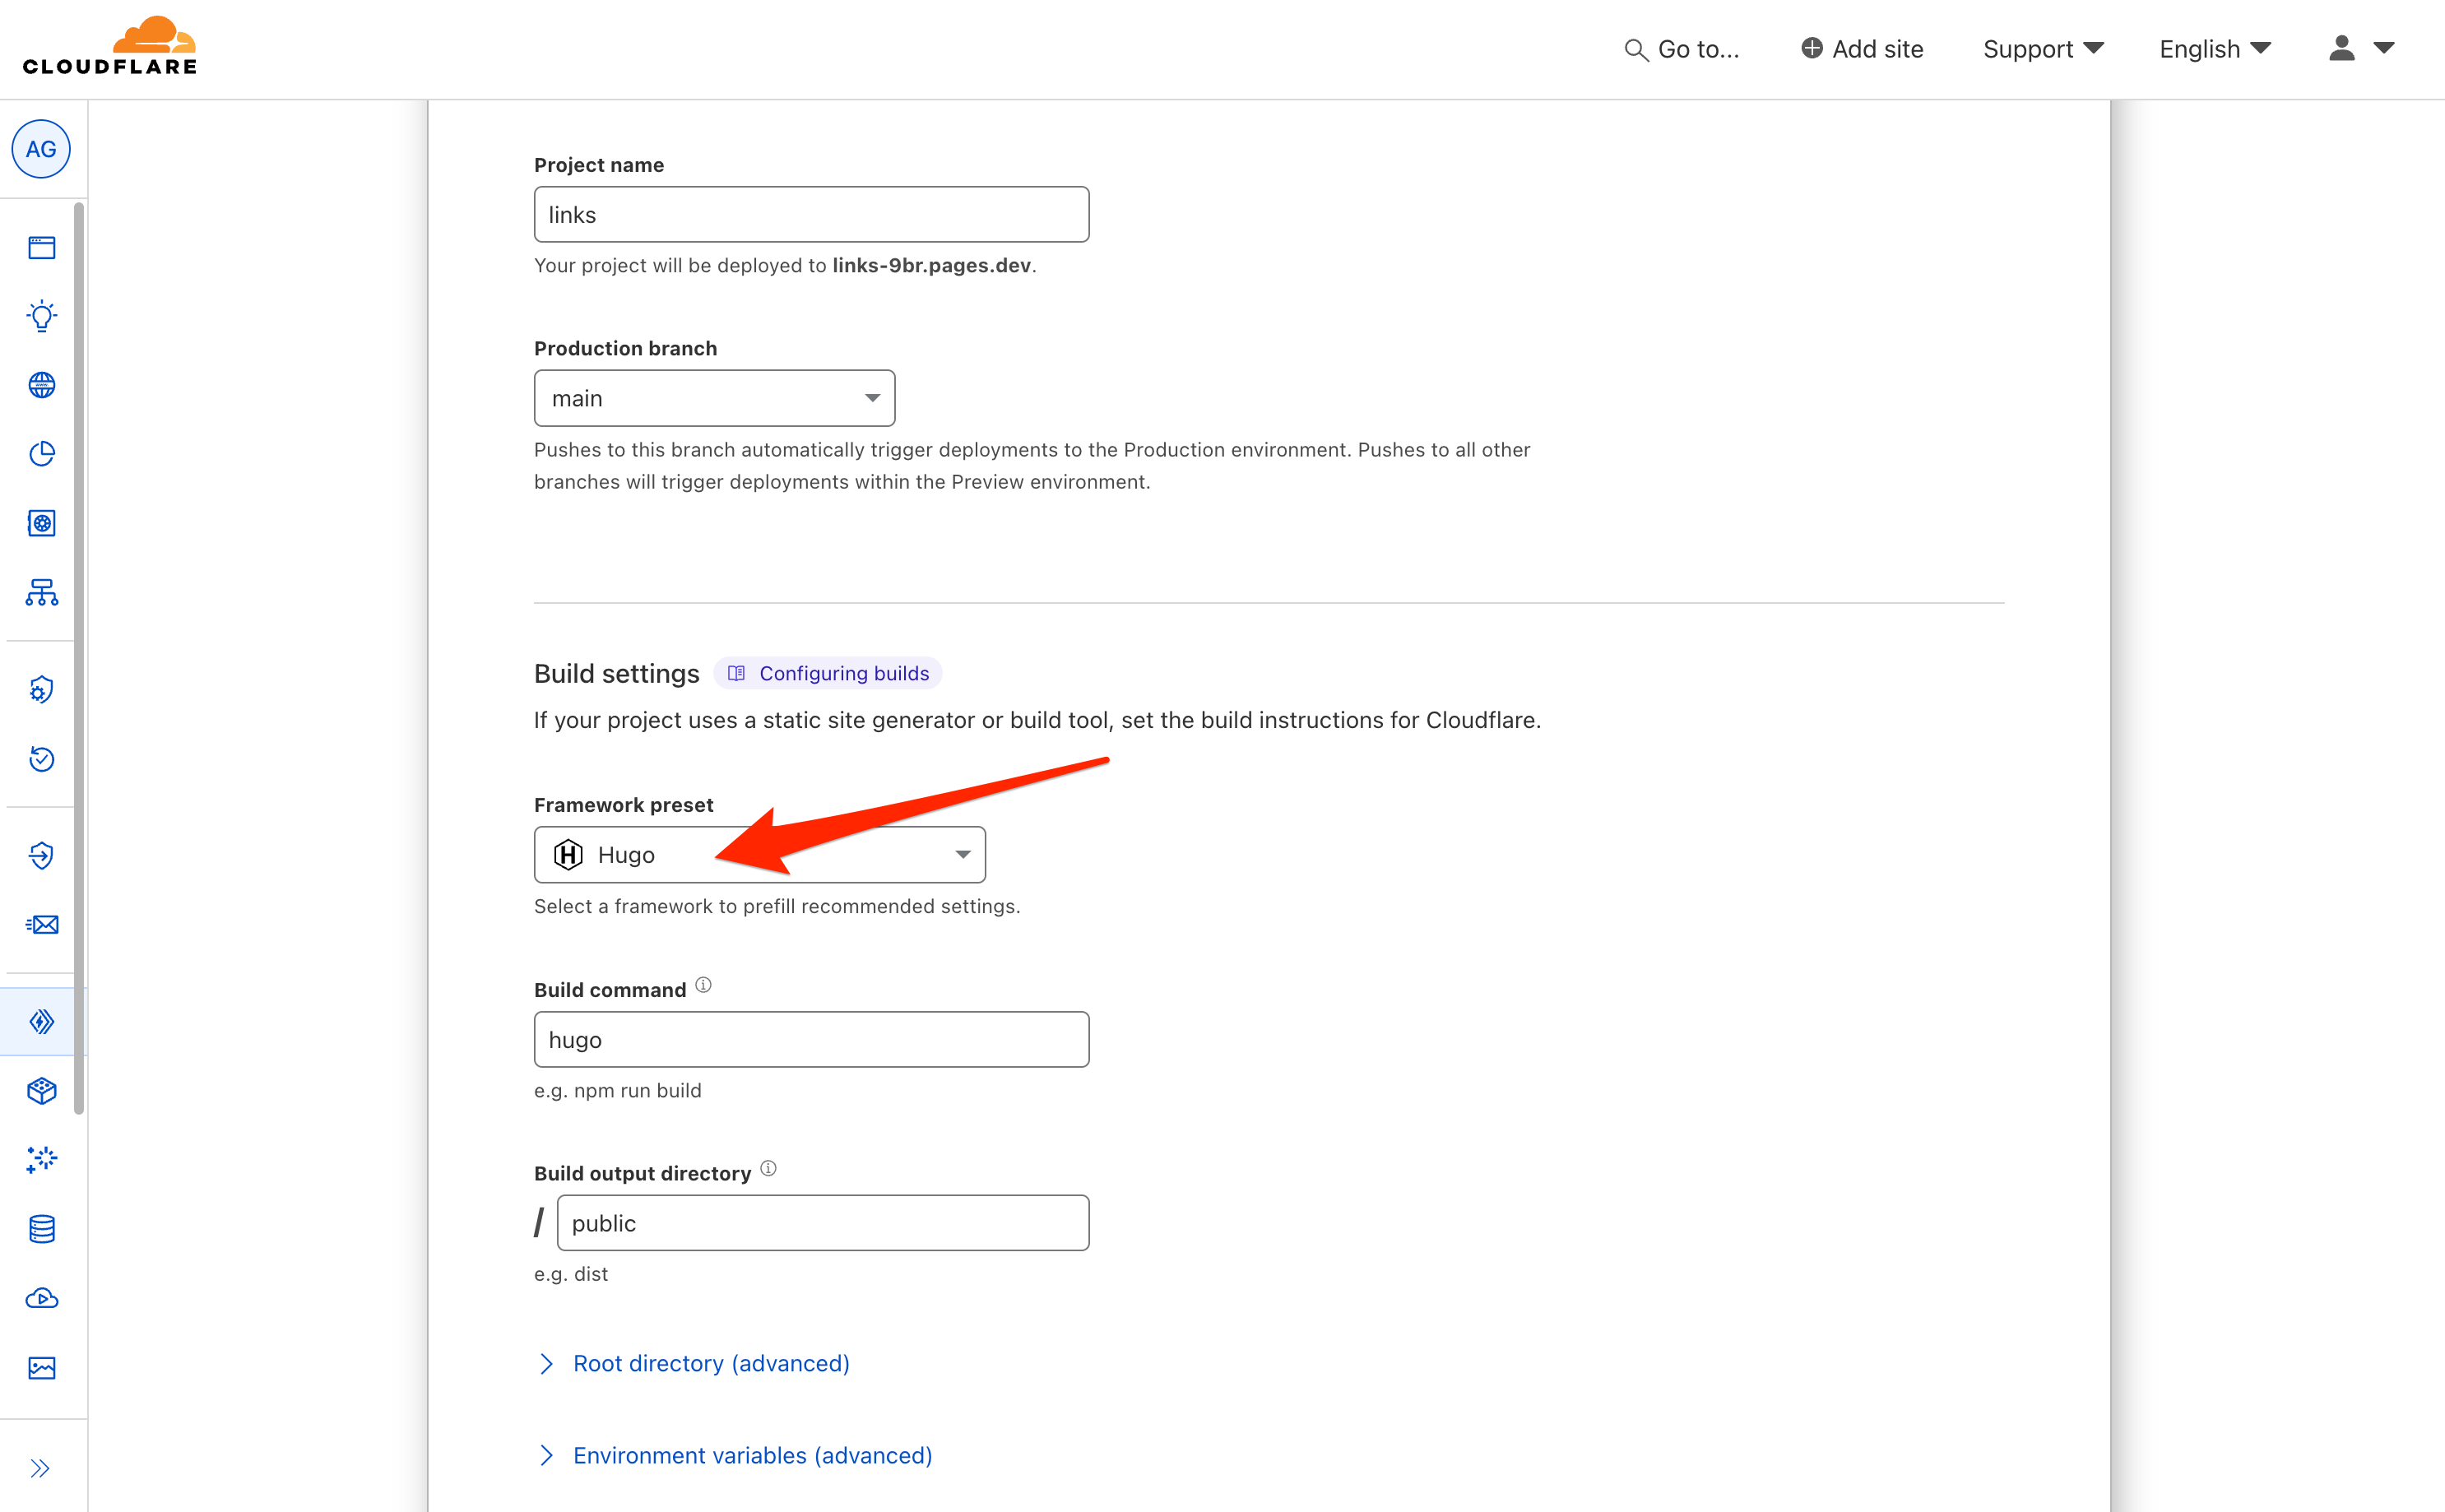
Then all that’s left to do is to select the framework preset. Just make sure this is set to Hugo and then click “Save and Deploy”.
Your links website will now be avaliable to view at the default link that Cloudflare sets for the project.
Setting up a custom domain
All that’s left is to set up the custom domain for the website.
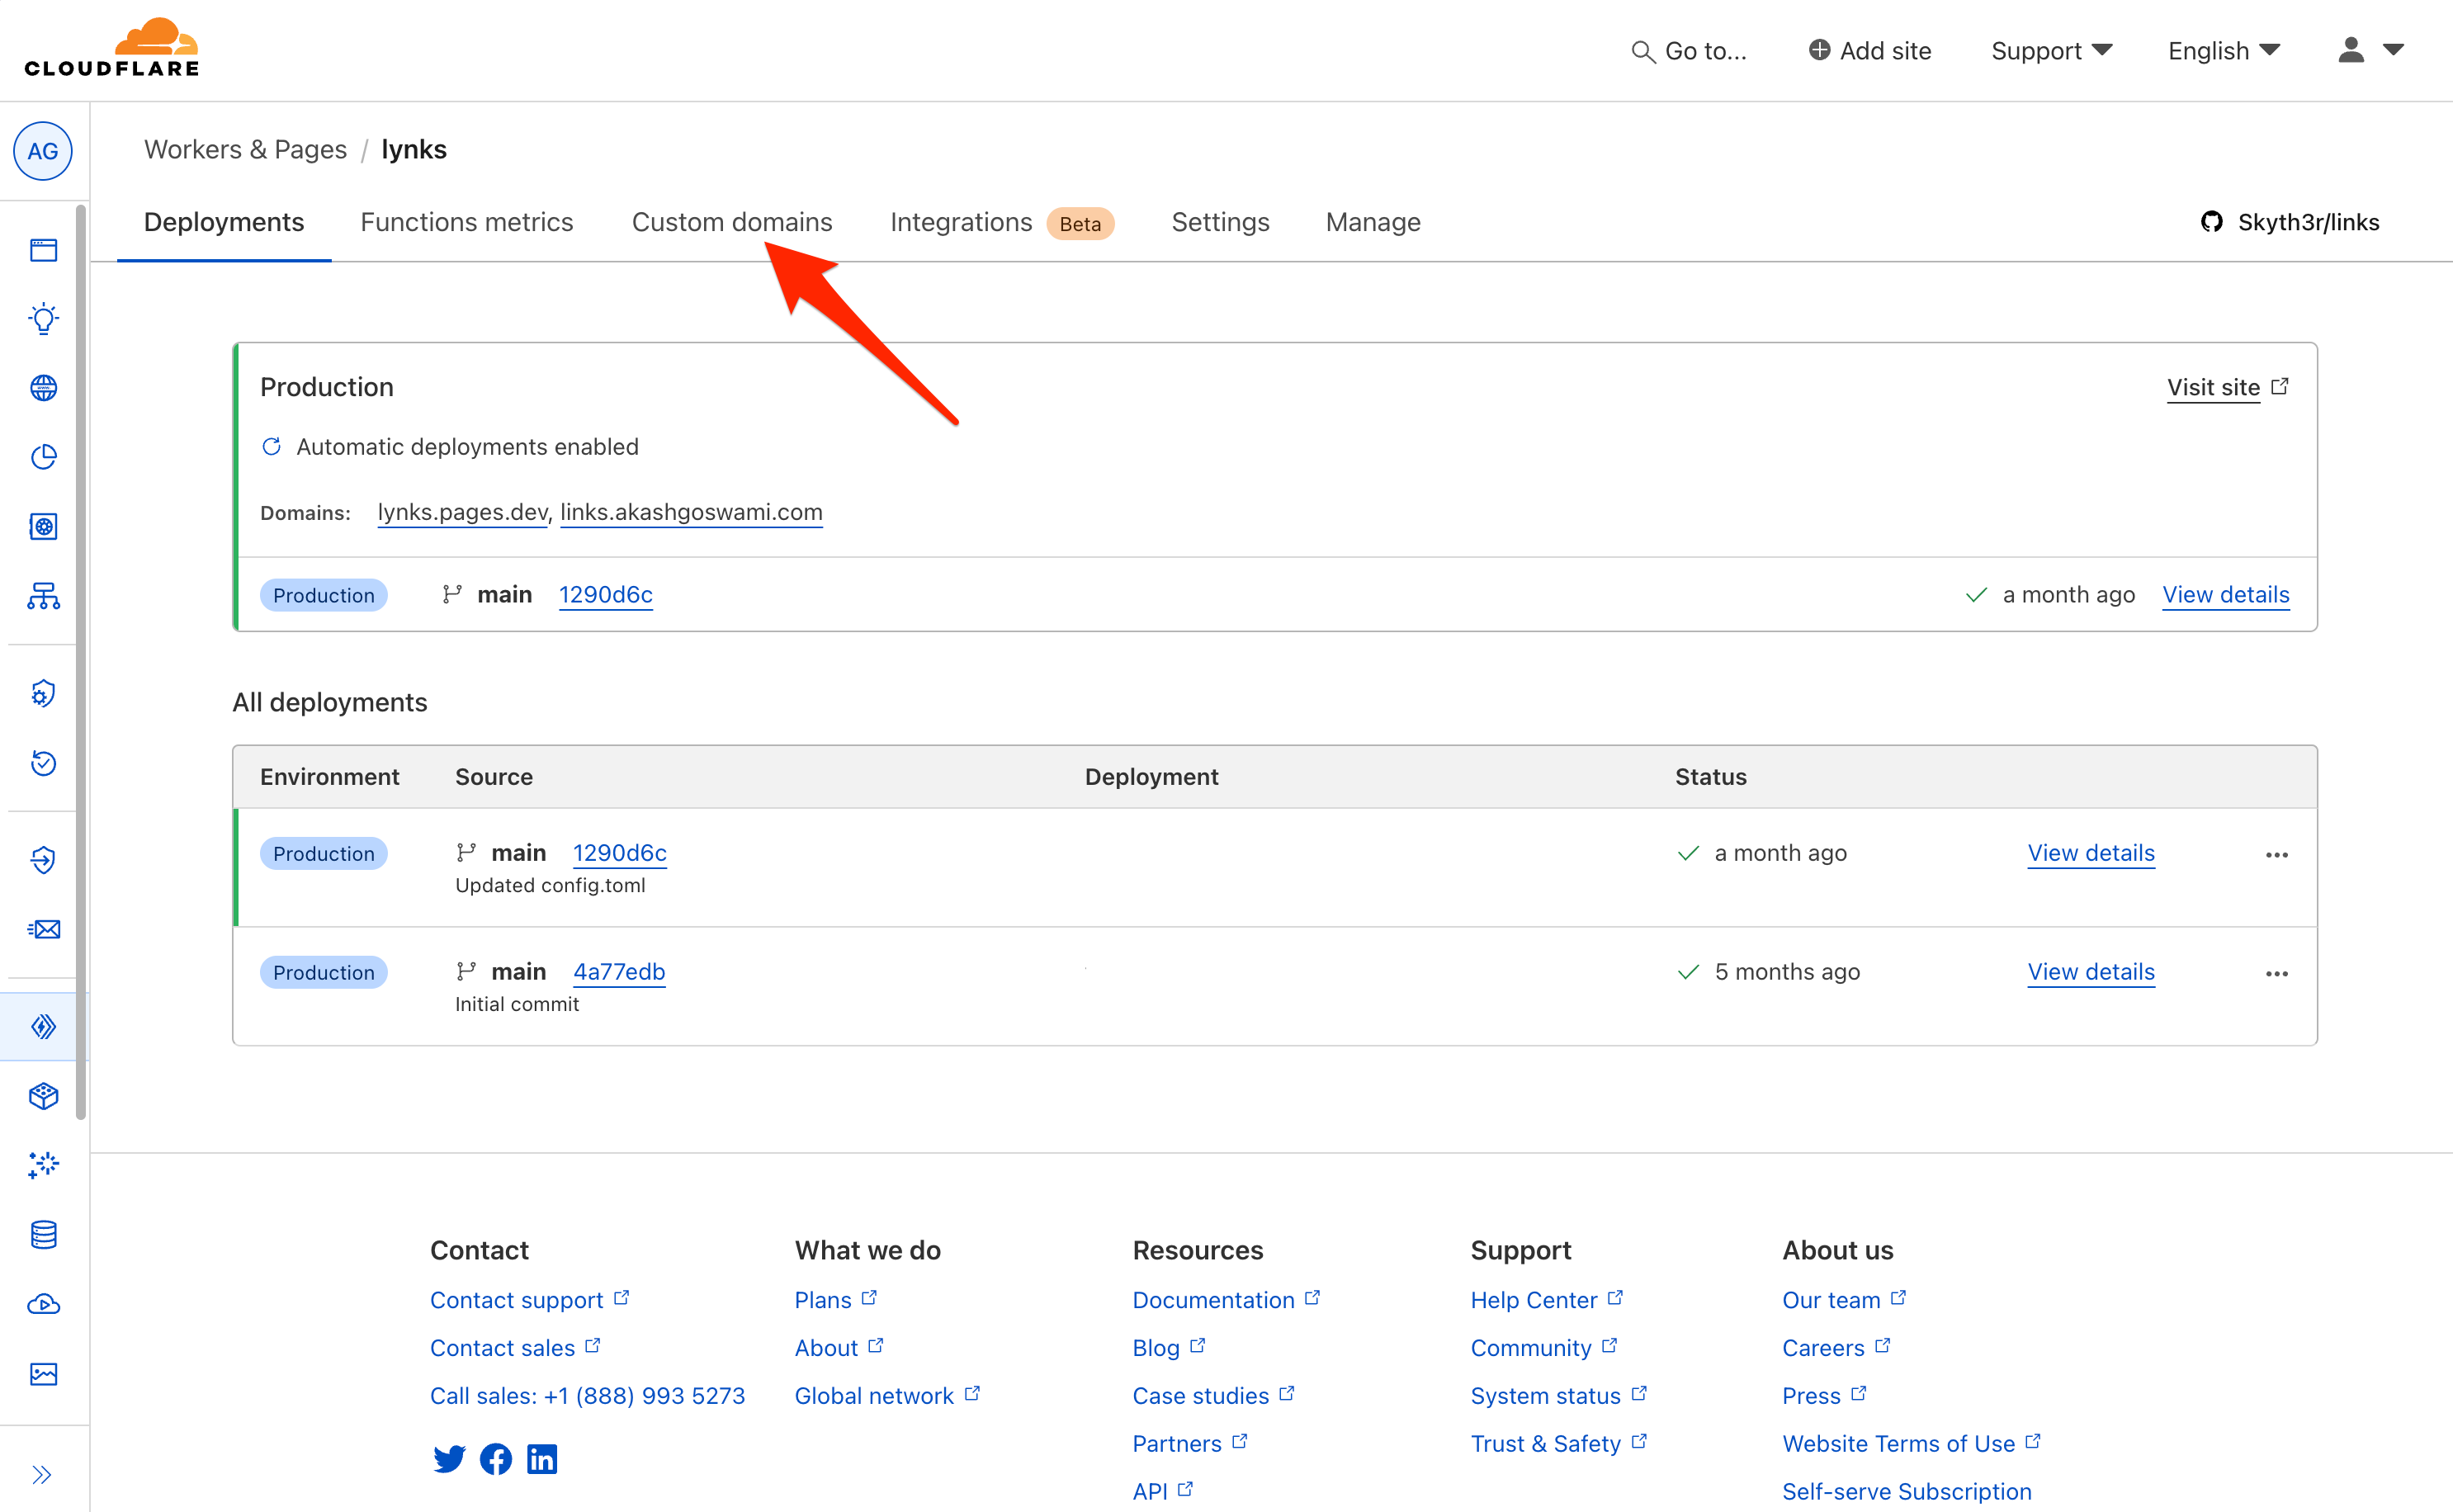
Head back to the Workers & Pages overview and then click into your links project, then click the “Custom domains” option and then the “Set up a custom domain” option.
Type in your domain (or subdomain) you wish to use and then follow the steps to setup the DNS from either Porkbun or transfer the DNS for your domain to Cloudflare.
Once everything is set up correctly, you should be able to view your links website on your custom domain 🎉
You can then go and make changes to your website on your machine, push those changes to GitHub and the updates will automatically pull through to your Cloudflare pages project!
This is currently how I deploy my links website. I even setup a second ‘short’ domain that redirects back to my links page 👉🏽 akash.lol
Now that you have your links site, feel free to add it your your social media or share it whereever you want!